Welcome to day 4 of the Suit Up For Summer blog tour hosted by Karly Nelson of Paisley Roots and Tami Peterson of Sew Sophie Lynn! I’m excited to have this opportunity to share my swim creations with you and I hope you’ll be inspired and encouraged to jump into the swim sewing world! We also have two awesome giveaways, thanks to our amazing pattern and fabric sponsors! Read to the end of this post to find out how to enter!
Boo! Designs Baby Swimmers, Ultimate Suit, and Swimmers
Jalie Board Shorts
Closet Case Bombshell
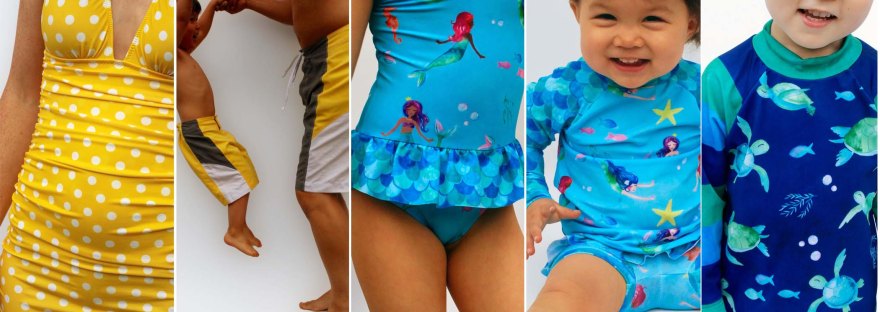
For this tour, I decided to sew up swimsuits for me and my kids, and since I never blogged the boardshorts I made for my husband and son last year, I’ll show those to you too!
If you’ve never sewn a swimsuit and you have kids, the Boo! Designs Baby Swimmers* (or the rashguard from the Boo! Designs Swimmers pattern*) would be my suggestion for your very first suit. (Note, I received the Boo! Designs Baby Swimmers pattern complimentary for purposes of review and promotion during this blog tour). The instructions are detailed and clear, with a complete guide to measuring and fitting so that you have a perfectly fitted swimsuit. The sizing is from premie to 2T. I used the Boo! Designs ruffle butt hack instructions* to add a ruffle around the top of the shorts. The only adjustment I made was using Framilon elastic to gather the ruffle. I bought this fabric from Peek-a-Boo Fabric Shop* – one of my favorite supplies of swim fabric!
Framilon is a clear elastic commonly found in Europe and available internationally on Etsy. It’s great for stabilizing and gathering knit seams while still allowing them to stretch. To gather with it, cut a piece the length of the edge that is NOT to be gathered. Divide both the ruffle and the elastic into quarters, marking the elastic with a sharpie and the ruffle with a washable marker. Use clips to align the quarter marks. Stitch elastic to the ruffle (begin by lock stitching, then stretch the elastic between the first two notches and stitch). If your fabric is particularly slippery, you may need to place a piece of tracing paper between your feed dogs and the fabric, then tear it away once it’s gathered.
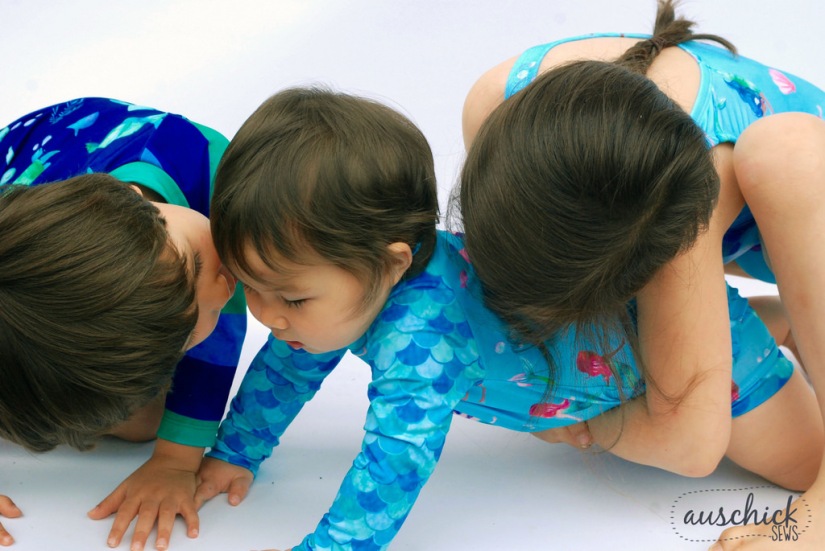
(This one is a huge fan of the camera! Her favorite word is “cheeeeese”!)
Swimsuit #2 – Boo! Designs Swimmers
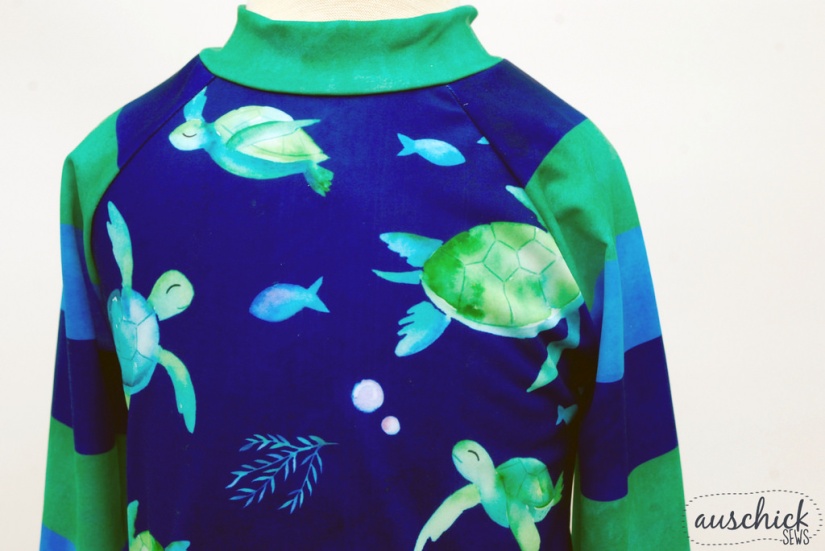
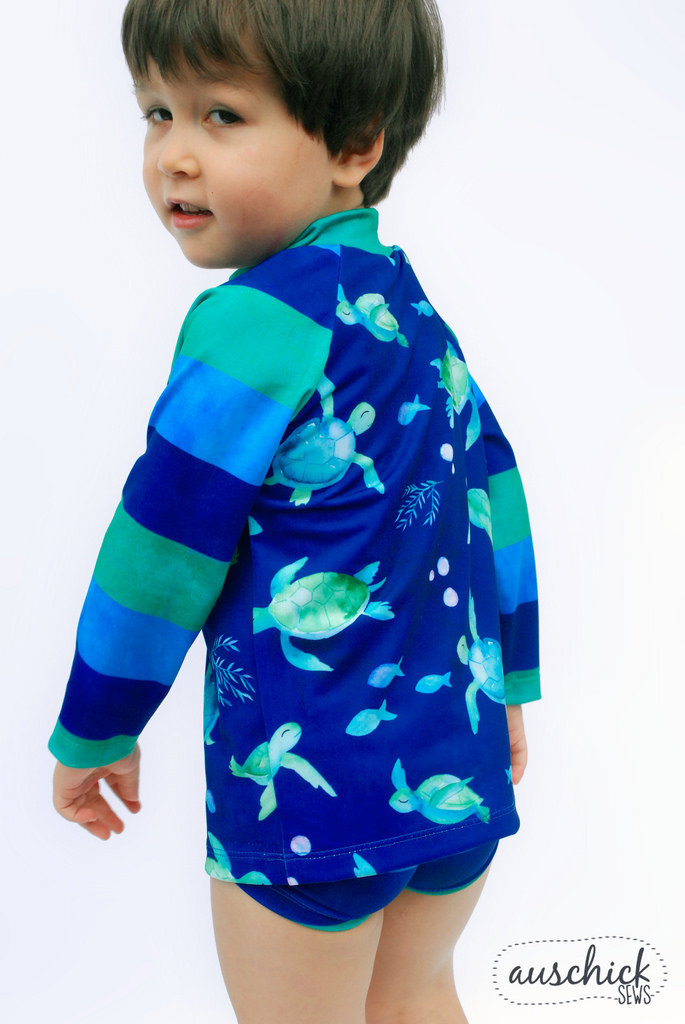
I used the Boo! Designs Swimmers* to make a rashie and boy shorts for my son. This is still my favorite swim pattern for kids – it’s just such a versatile pattern with one piece, two piece and rash guard options. If you could only pick one swim pattern and your kids fall within the size range (2-10), this would be my recommendation! This fabric is also from Peek-A-Boo*.
Tip: With the right tools, swimwear is easy to sew! If you only have a sewing machine, you can still make a swimsuit! Use a stretch/zig zag stitch and put a piece of tracing paper* between the fabric and the feed dogs so that the fabric doesn’t get sucked into the machine. A walking foot will also make your life easier!
Swimsuit #3 – Boo! Designs Ultimate Suit
Boo! Designs offered to provide a complimentary Ultimate Suit* pattern for this tour, so I decided to branch out and give it a try! This swimsuit has a slightly larger size range (2-14) and is more in the style of a traditional swimsuit. I think this one will be a staple for our swimming lessons over the next 14+ years ;-). It’s also (optionally) fully lined, has skirt options, and offers many color blocking opportunities.
One difference on this suit is the trunk measurement. Since it’s hard to make length adjustments once it’s made (the Swimmers pattern has straps made from binding that are easier to adjust at the end), it’s critical to make a muslin first (just use the basic pattern for this – omit the skirt and any color blocking). For my first muslin, I found the neckline too low. Remeasured and discovered my wriggly 5 year old was an entire size taller than what I had originally measured! I made up a second muslin using some leftover kelly green dance fabric and the fit on that was perfect! (I figure it can become either a swimsuit or a leotard). One thing that I am finding is that the back is riding up just a little. I’m not sure how to resolve this – maybe use less elastic? Or slightly change the shape of the butt? Lengthen it a little more? I’m not sure! She says it’s very comfortable though, so that’s a win in my book :).
Tip: It’s hard to perfectly align wriggly swim fabric! In tricky areas, such as at the start of a seam, when stacking multiple pieces together (such as 4 pieces at the crotch), or joining a hemmed sleeve (as in the Rashie), use sewline glue* or a little piece of washaway Wonder Tape* to baste.
Swimsuit #4 – Closet Case Patterns Bombshell
Now, for my swimsuit! I have been in love with the Closet Case Patterns Bombshell since it first came out many years ago. I feel like this pattern sort of revolutionized the swim sewing world a bit – before it came out, I never would have fathomed making my own swimsuit! Today there are many different independent swimsuit patterns on the market but this one still stands out as one of my favorites. And thanks to this blog tour, I finally had the courage to sew it up – the fabric and pattern have only been in my possession for a year hahaha.
For this suit, I made a muslin first. Since the pattern is drafted for 5’6″, I decided to lengthen it by 1 1/2″, but I found this was too much (I’m 5’7 1/2″). I decided to just lengthen it by 1/2″ and that was sufficient.
The Closet Case blog has a sewalong for this suit, and I recommend following that moreso than the instructions that come with the pattern. Also, be aware that this suit doesn’t have instructions for sewing up the lining so that the seams are concealed. I kinda wish I had made the Boo! Ultimate Suit prior to making the Bombshell and then using the knowledge from lining that one to lining this one.
The Bombshell has a lot of gathering (which is great for hiding mommy bumps!). I do wonder if I should have used power mesh in the front to suck everything in a bit more, but of course, we are always our biggest critics, right? I decided to do most of the gathering with Framilon clear elastic. I gathered each panel individually, but in hindsight I think basting the back and side seams together and then gathering them with elastic would be less time consuming and better for reducing bulk. Fabric from Peek-A-Boo*.
After sewing each seam, give it a good tug to make sure it still has good stretch. If not, do that seam again!
Swimsuit #5 & #6 – Jalie Boys & Mens Boardshorts
So I actually made these Jalie Board Shorts last year and then it took until this week to actually get them photographed. And I still haven’t quite got around to finishing the grommet tabs on my son’s pair. I admit, I have a love-hate relationship with grommets and this is why I have procrastinated in getting them finished. No matter how hard I try, I can never get them in quite right. Either they are too loose, or they get oddly smooshed. I have seen others have more success with the big fancy grommet press, but I’m hoping to make do with the little hand held one. Maybe next week I’ll brave completing these ;-).
Jalie Board Shorts
Anyway, I should probably call these the $100 board shorts. Why? Well I decided to use my coverstitch machine to do all the top stitching on these. But, my coversitch machine does not have the wide harp space that the Janome has, and so you need to be really careful sewing in the center of a garment. With just days before my husband’s birthday, and many seams to go, the frayed edge of the fabric got caught in the upper sewing mechanism and completely seized up my machine! Thankfully the repair guy was able to fix it in a day, and charged only $30 or something but it was certainly a lesson learned! While it was in the shop, I did most of the top stitching on my sewing machine instead – carefully lining up the rows because I didn’t want to deal with switching to a twin needle for every seam.
For my son’s pair, I wanted him to get lots of wear from them, so I sized up and added elastic at the back. I think it needs to have a few rows of stitching on top of the elastic to give it a smoother appearance because right now it’s a bit baggy. Next week? 😉
The pattern also does not include a mesh lining – my husband actually loved this fact. It has a little key pocket that he said he didn’t want, so I omitted it (and then as we were on vacation he was looking everywhere for a pocket to put our locker key into…. sigh…). The fit on these are great though and I made no changes to them. I would make them again, though they are quite time consuming. I would also add a back pocket to the mens version next time. The instructions for these are pretty bare-bones – detailed for sure, but mostly text based. You can download the instructions before buying to determine whether you’re ready to tackle them! (Fabric from The Fabric Fairy).
Phew, well there go you – swimsuits for the whole family! And now for the prizes: Two people will receive a haul of fabric and patterns from the sponsors listed in the graphic below! Head on over to Sew Sophie Lynn or Paisley Roots to enter the rafflecopter, and get a second chance by linking up any of your sewing projects made since January 1, 2017! (Ends May 30)
Thanks for stopping by today! Now, for more inspiration, check out the rest of these amazing bloggers:
I’m Natasha (Nat) and I’m an Australian girl who grew up in Hobart, Tasmania and moved to Northern Virginia, USA in 2005. When I was a kid, my grandmother taught me how to hand embroider, and later, between seventh grade home ec. lessons, my mother, and a lot of trial and error, I learned to machine sew too.
I mostly sew children’s wear but I'm also trying to make more of an effort to sew for me!
View all posts by auschick
They all look great! The Bombshell looks perfect on you. I’ve had the Jalie pattern for a few years, maybe this one is the year I actually make them. lOL
I absolutely LOVE all of these amazing pics!!! Y’all clearly had a fun time with those. I really like your fabric choices too and how you mixed them up for suit the patterns.
Thank you! My kids adore having their pics taken, so that helps!! I really love the swim fabrics at Peek-a-boo – they are especially great for kids, and the price is right too!
You certainly did a lot of swimsuit sewing for the tour! Great job on all of them and I love your yellow suit. I wondered about keeping the key pocket, too, when I made those trunks. Maybe I will make sure to keep it in next time, since I was going to omit it on the next pair.
Yeah, when I first signed up, the description said swimsuits for the whole family so I kinda took that literally lol. But really, the kids suits were really quick and needed to be done anyway!


 Framilon is a clear elastic commonly found in Europe and available internationally on Etsy. It’s great for stabilizing and gathering knit seams while still allowing them to stretch. To gather with it, cut a piece the length of the edge that is NOT to be gathered. Divide both the ruffle and the elastic into quarters, marking the elastic with a sharpie and the ruffle with a washable marker. Use clips to align the quarter marks. Stitch elastic to the ruffle (begin by lock stitching, then stretch the elastic between the first two notches and stitch). If your fabric is particularly slippery, you may need to place a piece of tracing paper between your feed dogs and the fabric, then tear it away once it’s gathered.


They all look great! The Bombshell looks perfect on you. I’ve had the Jalie pattern for a few years, maybe this one is the year I actually make them. lOL
LikeLike
Thanks! You can do this Maria!
LikeLike
I absolutely LOVE all of these amazing pics!!! Y’all clearly had a fun time with those. I really like your fabric choices too and how you mixed them up for suit the patterns.
LikeLike
Thank you! My kids adore having their pics taken, so that helps!! I really love the swim fabrics at Peek-a-boo – they are especially great for kids, and the price is right too!
LikeLike
You certainly did a lot of swimsuit sewing for the tour! Great job on all of them and I love your yellow suit. I wondered about keeping the key pocket, too, when I made those trunks. Maybe I will make sure to keep it in next time, since I was going to omit it on the next pair.
LikeLike
Yeah, when I first signed up, the description said swimsuits for the whole family so I kinda took that literally lol. But really, the kids suits were really quick and needed to be done anyway!
LikeLike
your photos are so fun! Love the bombshell suit, looks super cute!
LikeLike
Thank you!
LikeLike
Oh my goodness these are all fabulous!!!! You look amazing!! Love the tips too!!
LikeLike
Thank you!!
LikeLike