

Welcome to today’s stop on Sewing By Ti’s, “Dress Up This Town” blog tour! I’m excited to share my labors of love with you today! (We also have a giveaway going too! See the rafflecopter at the end of my post!)

When Ti announced this tour last month, I figured I would sign up, use a pattern I already owned, and use up some fabric that I bought while in NYC last month.
And then the Rebecca Page Emma Dress* came out and Fabric Mart Fabrics (whose newsletters I have subscribed to for years but had never purchased anything – until I attended an American Sewing Guild Workshop last month with Pamela Leggett of Threads Magazine and Craftsy, and she raved and raved about them!) had an amazing sale on this beautiful chiffon by Maggy London. Of course I had to get both.


About the Fabric

Chiffon.
Oh so beautiful! Oh so billowy! And oh, what a bear to cut out and sew!

Thankfully I had purchased “The Essential Guide to Sewing with Sheers” on Craftsy* during a sale a few months ago, so I watched some of that in preparation — and was “watching” it as I cut out all the pieces. Which I think, by the way, took me at least 4 nights to cut out all three dresses on my dining room table!

Even though this project took way longer than I anticipated, the fact that this fabric is so beautiful really did help me to keep working on it (well, that and a blog tour deadline, haha!)

Growing up, my mum always told me that you should always use the best quality lining that you can find. So armed that advice, I found this NY Designer Pongee Lining – also on sale. I have to say: this lining is *amazing*! It’s not wriggly or shiny – it is just a perfect lining. I want to use it on everything!

For the interfacing, I used Palmer/Pletch Light and I have to say – if you have only been using Pellon interfacing products in your garments, you HAVE to try the Palmer/Pletch ones. They are SO much better!! (I’ve also heard great things about the interfacings from Fashion Sewing Supply).

If you’ve never worked with chiffon before, it’s not all doom and gloom, I promise! Here’s a couple of tips:
- Cut your patterns in one piece — do not cut on the fold.
- Use a large cutting surface so that the fabric doesn’t shift around/drag.
- Use a rotary cutter and self healing mat.
- Use a sharp (microtex) needle, size 70/10.
- Particularly when serging, use washaway stabilizer. This stops the fabric from rolling under and your seams looking really wonky.
- As much as possible, use French Seams.
- Use masking tape to mark the wrong side of the fabric (remember to take these off before you close up any linings…. sigh….)
- Use washable marker to mark your notches (I use Crayola ultra washable markers)
- Don’t back tack.


About the Pattern
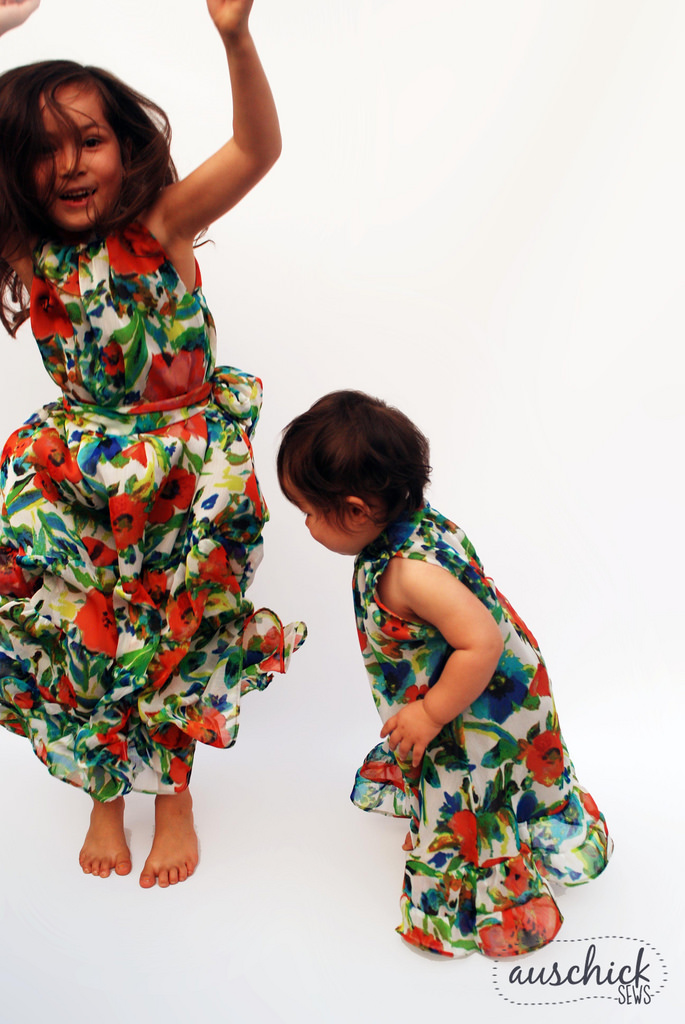
The Emma Dress by Rebecca Page* comes in three size ranges – doll, child (newborn – size 12) and womens. It has multiple length options – top, tunic, knee, tea and maxi. I made the maxi for me and my eldest daughter, and the tea for my youngest (though I used the 12-18 month bodice and 18-24 month length, so it is a bit long for her still). Both my girls ADORE their dresses – I’m not sure which one loves it more!! Even the 17 month old was giddy as I put it on her, and bolted to our photo spot so she could have her shoot done!

While this dress looks gorgeous, I just don’t think it’s really a good choice for chiffon. There’s no traditional armscye in it – the side pieces are straight, and just have notches to show where you need to stop your seam. As a result, there’s no way to successfully do a French Seam (the instructions have you do a plain seam with clean edge finish but call it a French Seam). In the end, I resorted to individually serging the side seams (using washaway interfacing to keep them looking nice). I am hoping it all holds up in the wash!

Overall, I didn’t love the directions. They do have two sets — one is a summary with high level instructions for advanced seamstresses. The other is the full tutorial. I found myself flipping between the two when things didn’t seem to make sense.

The major change I made from the instructions was the way I installed the lining. Ultimately, I sewed it as a traditional lining – one inside the other, stitching the openings together, understitching, and then flipping out the right way. The underarms ended up being rather bulky and a bit bunched up with this method, but I found the method of wrapping the outer fabric around the lining (as described in the instructions) to be way too cumbersome.

I also decided to hand stitch the collar lining in place rather than machine top stitching it. (Since my collar was sheer, I ended up cutting two linings out. One lining I spray basted to the outer collar, and the other I fused to the interfacing. By doing this, I prevented the seam edges from being visible through the fabric).

To make it easier to hem this dress, I started by serging the hem (with washaway interfacing) and then folded it over twice and stitched down with my sewing machine.
So, would I sew this again? I think I would do it again, but in my opinion it would be most successful as an unlined knit. The inability to do a French Seam in the bodice is a big drawback for sheers. (Though, as I ponder more about this, there might be a workaround by using a tricot binding tape).

Enter to win!

Remember to enter our Week 3 Rafflecopter Giveaway for some great prizes from Sis Boom, Patterns for Pirates, Designer Stitch, and Simply By Ti!
a Rafflecopter giveaway
Thanks for stopping by today, and don’t forget to visit and share some comment love with the the rest of the stops on our tour!
Week 1: July 1st-8th
1- Sewing By Ti (Intro) and Stitching At Night
2- Me Made
4- Sewing By Ti
5- Seams Sew Lo
Week 2: July 9th-15th
10- Ma Moose
12- Seams Sew Lo
13- Kate Will Knit
Week 3: July 16th-22nd
17- That’s Sew Lily
19- Auschick Sews ***You are here. 😀
20- Anne Mari Sews
21- Lulu and Celeste
Week 4: July 23rd-31st
24- Sewing Curves
26- Indulging Mum
27- That’s Sew Lily
28- Adventures With Bubba and Bug
30- Sewing By Ti
31- Sew Like a Sloth


*Affiliate link

wow, this is soooo impressive!! The fabric is just stunning, and the dresses too! It looks like the 3 of you could go to a big movies premiere in it! Really gorgeous! I love how the kids pose too, so funny to see how even little girls can be so self-conscious, or so it seems 😉 But you can’t ‘blame’ them in a dress like that! My daughters would also feel like little big queens in them! I’m also so much impressed with you making not 1 but even 3 dresses, and all 3 not with the easiest fabric and techniques! What a great job!! Thanks for all the advice too, by the way 😉
LikeLike
Thank you so much! All my kids ADORE the camera! I think the baby’s first word was “cheese”!!!! She is queen of the camera smile – it cracks me up! At least I was able to get on a bit of a roll with them after doing the first one — though all that gathering takes *forever*!!
LikeLiked by 1 person
I love what you’ve done with this fabric. I can’t believe it’s chiffon, it must have been a real labour of love. It’s so beautiful though, no wonder you stuck with it! Thanks for the details on the giveaway too.
LikeLiked by 1 person
A lot of unpicking was done — it is so billowy that the wrong bits kept getting under my needle as I was sewing!! 😥 😥
But I do love it (now that it is done!)
LikeLike
Well worth it. 🙂
LikeLike
I am so happy I read your post. I considered that pattern when it first released, but I’m not sure it’s suited to my body type, now I’m extra glad I passed. Your dresses are beautiful, and I’m sure it’s marvelous, just not for me.
LikeLike
Glad I could help ;-). Thanks for stopping by 🙂
LikeLike
Gorgeous dresses! I always love Mommy and Me outfits and chiffon!!
LikeLike
It seems I’ve also been told I have to make a doll version!! Good thing this pattern actually comes with one!
LikeLiked by 1 person
How fun!! I can’t wait till my daughter is old enough to want to match her dolls too. I think she’s almost there 😉
LikeLike
This fabric is breathtakingly beautiful! I love the dresses!
LikeLike
Thank you! I do love how they turned out! And bonus: I have 2 yards left 🙂 🙂
LikeLike